Showing posts with label Huerta. Show all posts

8.09.2011

Student Body


"Student Body"

What you need: 

Tubes of choice, I used artwork by Armando Huerta
Font of choice, I used Saginaw
Graphic Program of Choice, I use PSPX2

Let's Begin!

1. Open a new transparent image
Open all of your supplies

2. C/P the frame of choice
Add drop shadow
Create a new raster layer behind the frame layer
Using your lasso tool, trace along the open area of the frame
C/P the paper of choice inside selection
C/P the stack of books from the kit
Re-Size as needed
Add drop shadow
C/P the word art of choice
C/P the tube of choice above the Word Art Layer
Add Drop Shadow
C/P the smudge of choice behind all layers
Duplicate and place similar to above
C/P the apple above the frame layer
Add drop shadow
Re-Size as needed
C/P the second tube of choice above the paper layer
I made mine B&W


Add copyright info and name and your done!!!

Super simple this time!


This tutorial was written at 8:30 PM August 9th, 2011 by Pimp'd Designz

5.26.2011

Good Girls Bad Girls


"Good Girls Bad Girls"

What you Need:

Artwork of choice, I used artwork by Armando Huerta
Scrap Kit, "Good VS Evil" by Designs by Sarah
Font of choice, I used SA Cinta and Saginaw
Graphic Program of choice, I use PSPX2

Let's Begin!

1. Open a new transparent image
Open all of your supplies

2. C/P the circle frame from kit and rotate 90 degrees to the right
Add drop shadow
Create a new raster layer behind the frame layer
Using your lasso tool, trace along the open area of the 2 smaller frame circles
Flood fill with a gradient of choice
Do the same thing for the larger circle frame, with a different gradient
C/P the flame from the kit above the frame layer
Re-Size as needed
C/P the large cloud from the kit above all layers
C/P the light effect behind the cloud layer
Re-Size as needed
C/P the sun element behind the cloud layer
Re-Size as needed
C/P the tubes of choice
Position as shown above
Re-Arrange any elements that may need to be centered around the tubes
C/P the Halo from the kit above the cloud layer
Rotate 20 degrees to the right
Duplicate and drag one layer behind the frame/gradient layers
Trim the top halo layer so it gives it a "wrap around" look

3. Add any wording you'd like
I applied noise to the text
Use a gradient to fill in the text for your name and add noise


Add Copyright info and your done!

This tutorial was written on May 26th, 2011 at 3:15 PM by Pimp'd Tagz


1.16.2010

Pimpin'


"Pimpin'"


What you need:
Tubes of choice, I used artwork by Armando Huerta
Scrap kit, "Color Me Purple" by Designs by Sarah
Alpha, "Pimped Out" by Designs by Sarah
Font of choice, I used Pea Joraanstad
Graphic Program of choice, I use PSPX2


Let's Start!


1. Open a new transparent image
Open all of your supplies


2. C/P the multi-frame from her kit
Create a new raster layer behind the frame layer
Using your lasso tool, trace along the open area of the frame
C/P the paper of choice inside selection


2. Using the Alpha mentioned above, create the word art "Pimpin"
Add drop shadows to each letter
Rotate different ways to give it a look similar to above
Be sure when re-sizing and rotating, you sharpen each letter


3. C/P the main tube above the frame layer
Add drop shadow
C/P the 2nd & 3rd tube above the paper layer
Trim and re-size as needed
Go to your blend drop down menu above the layer menu
Choose "Screen" for each tube layer
Merge all layers visible


Add copyright info & name & you are done!


This tutorial was written on Jan.16th, 2010 at 11:00 PM by Pimp'd Tagz

4.11.2009

Betty Troop

"Betty Troop"

What you need:

Tube of choice, I used artwork by Armando Huerta and you can purchase his work here
Scrapkit, "Jasper" by me and you can purchase that kit here or here
Dog-Tags, FTU Add-On here by me
Font of choice, I used Aquarella
Graphic Program of choice, I use PSPx2

Lets Begin!

1. Open a transparent image 600x600 pixels
Open all of your supplies

2. C/P frame of choice, I used the brown paper frame
Create a new raster layer behind the frame layer
Using your selection tool, rectangle, trace along the frame opening
C/P the paper of choice into selection
C/P the tube or photo of choice as a new layer
I added a lightened sepia tone to the tube using the photo editing tool in PSP
Add drop shadow
Trim as needed

3. Merge the frame, paper and tube/photo layers together
C/P the leaves of choice as a new layer
Add drop shadow
Duplicate and arrange around the tag frame
Add any other elements of choice
I used:
Oval Metal frame
Dog tags
Bow
Winged Heart
Tattered Heart
Staple
Circle Ribbon
Add drop shadow as needed

Add copyright info and name and you are done!

This tutorial was written on April 11th, 2009 at 3:50 PM by Pimp'd Tagz

1.23.2009

Private Dances

This is for an animated tag, please click here to view animation
"Private Dances"
Things you will need:
Tube of choice, I am using artwork by Armado Huerta and you can purchase his work here
Scrapkit of choice, I am using "Peep Show" which is a collab by the girls at "Pimp My Tags" and you can purchase their kit here
Font of choice, I used Brisa Alternates
Xenofex 2 Plugin
Graphic Program of choice, I use PSPx2
Animation Shop
Let's Begin!
1. Open a transparent image, 600x600
Flood fill if you wish.
Open all of your supplies
2. Copy and paste the frame of choice.
Copy and paste your tube of choice.
Trim any parts you do not wish to hang over the frame.
Add any drop shadows.
Add any other elements.
Create a new raster layer in your layer menu BEHIND the frame layer
3. Using your vector pre-shapes, use the circle shape and drag along the shape of the frame.
Adjust as needed.
Apply your text to the new RASTER layer, not the vector layer.
Type in "Private Dances" or any other wording of choice.
Apply a drop shadow.
Delete the vector layer.
Add any copyright info and name now,
if you do not how to apply a text to an animated tag.
4. Go up to your filters and choose the Xenofex 2 -> Constellation
My settings were:
Size: 6
Variation: 25
Edge Star Density: 19
Overall Density: 8
Overdrive: 100
Twinkle Amount: 75%
45 degree rotation
Keep original image
5. Once you have the way you like, Save as frame 1.
Hit the back button or undo button.
DO NOT TOUCH THE SETTINGS.
Simply click "Random Seed"
Save as Frame 2.
Repeat steps as many times and you would like.
I only made 3 frames.
6. Open your frames using the anaimation wizard.
{If you left the background transparent, you will need to check the "transparent" box when using the animation wizard}
Once they are opened, play animation, add name if you need save and you are done!
This tutorial was written on 01-23-09 at 11:45 am by Pimp'd Tagz


1.21.2009

Sexy Cupid II

"Sexy Cupid II"
Things you will need:
Tube of choice, I am using the artwork of Armando Huerta and you can purchase his work here
Scrapkit of choice, I am using "Je'Taime" by Grunge & Glitter and you can buy her kit here
Font of choice, I used A&S Snapper Script
Graphic Program of choice, I used PSPX2
Let's begin!
1. Open a transparent image, 600x600 pixels.
Open all supplies.
2. Copy and paste as a new image the multi-heart frame in her kit.
Create a new raster layer behind the frame.
Using your lasso tool, trace along the large center heart.
Paste INTO selection the first paper of choice.
Continue to do this with all of the hearts in the frame.
(Paste the paper INTO the selection, on the new raster layer)
3. Copy and paste any other elements you wish.
Add any drop shadows.
Copy and paste the tube of choice.
4. Add your copyright info and name.
You are done!
This tutorial was written on 01-21-09 at 9:30 pm by Pimp'd tagz

1.18.2009

Jealousy is a Disease :: Get Well Soon

"Jealousy is a disease, get well soon"
Things you will need:
Artwork of choice, I am using artwork by Armando Huerta and you can purchase his tubes here
Scrap kit of choice, I am using "Smitten" by TammyKat and you purchase her kit here
Word Art by me HERE
{Just right click and save}
Font of choice, I used 2Peas Fancy Free
Mask of Choice
Graphic Program of choice, I use PSPX2
Let's begin!
1. Open a new image 600x600 pixels
Open all of your needed supplies
2. Copy and paste your frame of choice.
Create a new raster layer behind the frame layer.
Using your selection tool, rectangle, trace along the frame.
Choose a background paper and copy and paste INSIDE selection,
Make sure you are doing this inside the newly created layer.
3. Copy and paste your tube of choice above the frame.
Now with a frame like this one, with ribbons already attached,
You will need to duplicate this tube once you have it in place.
Have one tube layer above the frame and one below the frame.
With the tube layer above the frame, trim away any parts of the tube covering
the areas you want to show, like the ribbon on this frame.
Merge the tube,frame,tube,paper layers together.
4. Choose a second paper and apply the mask of choice to that paper.
Resize if needed and copy and paste behind the frame layer.
5. Copy and paste the included word art if choose to.
Or type something else or leave it blank.
6. Add any other elements, copyright info. etc.
Merge all visible
And you are done!!
This tutorial was written on 01-18-09 at 8:30 pm by pimp'd tagz

1.13.2009

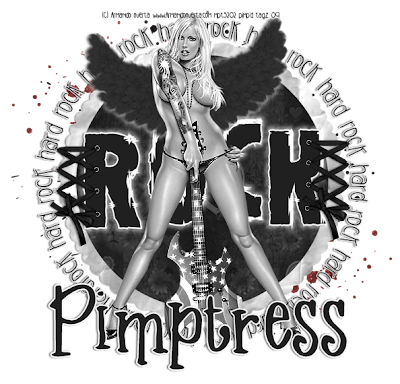
Rock Hard

This is a tutorial for a ANIMATED tag, to see the animation we will be working on click here
Things you will need:
Tube of choice, I am using the artwork of Armando Huerta and you can purchase his artwork here
Scrap Kit of choice, I am using the wonderful scrap kit by Just A Girl Designs entitled "Broken Wing" and you can purchase the kit here
Supplies included here
Font of choice
Xenofex 2 Plug-In
EyeCandy 5 : Nature
Graphic Program of choice, I am using PSPX2
Let's begin!
1. Open a transparent image, 600x600 pixels, flood fill white.
Open all of your needed supplies into your program now.
2. Copy and paste the splatter in the background, as a new layer.
Now copy and paste the paper frame included in the supplies as a new layer.
3. Using your magic wand tool, select the inside of the frame, in that layer (frame layer).
4. Create a new raster layer BEHIND the frame layer.
Go up to "selections", down to modify, and then over to expand and choose "4".
Copy and paste the paper of choice INSIDE selection.
You can now merge the paper layer and frame layer together.
5. Copy and paste the word art included as a new layer. Move as needed.
6. Copy and paste the tube of choice, I chose to make my image black and white.
If you wish to do the same, do that now.
You can do that by clicking on "effects" down to "Photo Effects" and over to "Black and White Film" and play around with the settings until you are happy with how it looks.
7. Copy and paste the wings included in her kit BEHIND the tube layer. If you happen to be using the same tube as shown, I rotated the wings 6 degrees to the left, to go with the frame and position of her body. You may also need to do this depending on the tube you are using.
Apply the Corona filter from EyeCandy, white coloring.
8. Add any other elements, words, etc.
Add your copyright information and name, if you don't know how to add a name AFTER a tag is animated.
Now we are moving on to the animated part of the tag.
We will be making each frame one at a time in PSP.
Let's begin!
A. Using your magic Wand select a area on the tag you would like to add the lightning.
Now go up to Effects, down to plug-ins and over to Xenofex 2, electrify
Here are my settings:
Arc Spacing: 17.00
Arc Length (Pixels):126.21
Arc Thickness: 20
Jaggedness: 95
Branching: 97
Branch Spread: 7
Glow Tab:
Glow Width: 38
Glow Opacity: 58
Inner Glow: #ffffff
Outer Glow: #acadd0
B. Now if you have it where you would like it, hit okay.
Save as Frame 1 or however you'd like.
C. Now DO NOT CLOSE THE IMAGE!!!
D. Hit your undo or back arrow, until all you see is the "Marching Ants" around the selection you have chosen. Go back into Xenofex and hit ONLY "Random Speed".
This will change the direction of the arc but not the settings. Find one you'd like, and then hit ok.
Save as frame 2.
E. REPEAT as many times as you would like, I have a 4 frame tag.
Now open Animation shop.
Click the Animation Wizard button, which looks like a film strip with a wand over it.
Leave all settings as you have them set, and open all the frames you created in PSP.
F. Hit the "View Animation" button which is right next to the question mark.
If you are happy with it, save it and your done.
*I have my animation speed set to 45*